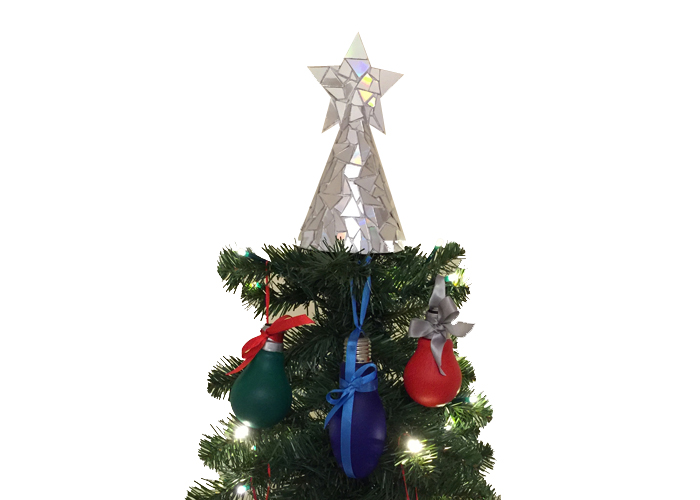
If you are looking for Christmas craft ideas have you considered looking at your waste for inspiration? Creating your own Christmas decorations can be great fun and a chance to upcycle waste items you have in your home. So with this in mind we put our creative minds together for how to use electrical waste to create Christmas decorations. The image above shows some of our crafty Christmas decorations and how they look on our Christmas tree. We have detailed how we created them below if you wish to recreate them. Our decorations were made from customers waste and craft accessories purchased from Hobbycraft, other craft stores should stock similar items.
CD Mosaic Christmas Tree Topper
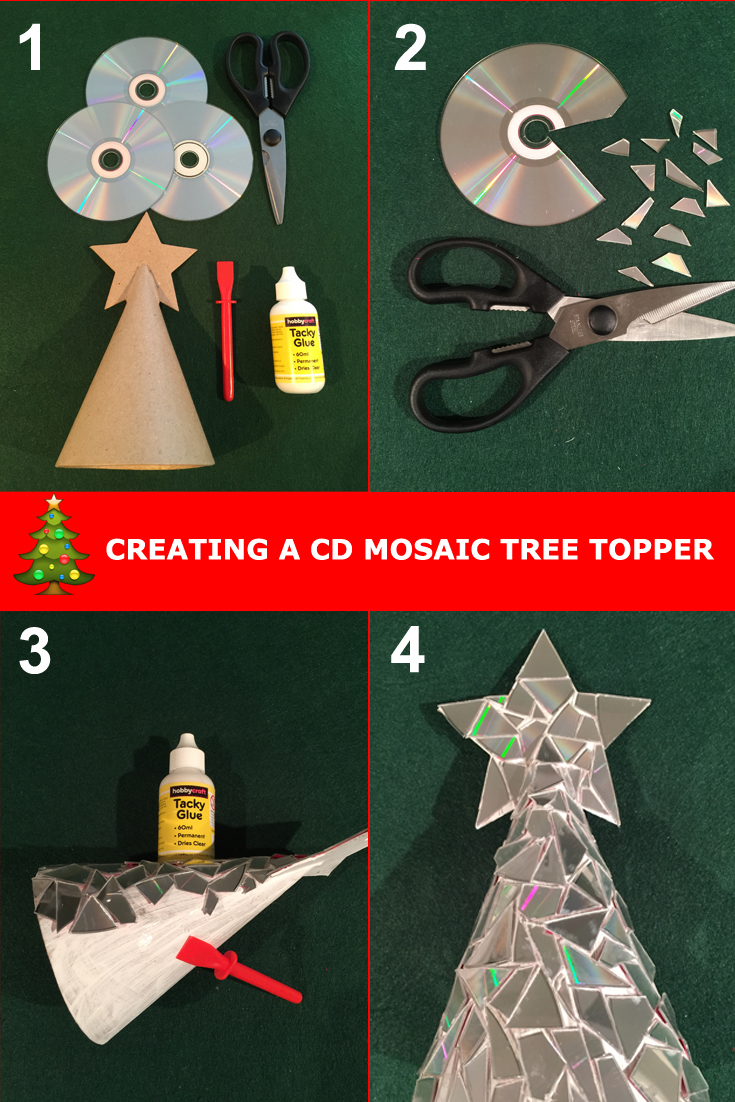
Due to the reflective properties of a CD they make a great craft supply. We thought they would look good as part of a shining star mosaic Christmas tree topper. To create our CD mosaic Christmas tree topper you will firstly need a base. Due to time constraints we cheated a little and purchased this one , for those who wish to create this too there is a great ‘how to’ here.
Stage 2: Using a strong pair of scissors begin cutting the CDs into small pieces.* We began cutting through to the centre of the CD then cutting smaller pieces in triangular shapes. The pieces may crack or shatter areas of the CD but do not worry as you can still use these on the topper.
Stage 3 : Taking small pieces of the CD, begin glueing them onto the topper base, the smaller the pieces the easier they stick onto a non flat surface. We started with the star front and worked our way down. Try and align the pieces with a small gap in-between but do not worry too much about being exact.
Stage 4 : Once we completed one side of the topper, we allowed it to dry overnight then completed the second side. Once both sides are dry gently wipe off any glues residue on the shiny surface to allow for better light reflection. Once clean the topper is ready to sit proud on the tree.
*Please note the CD pieces can be sharp so be careful that children or pets do not play with the topper.
Light Bulb Baubles
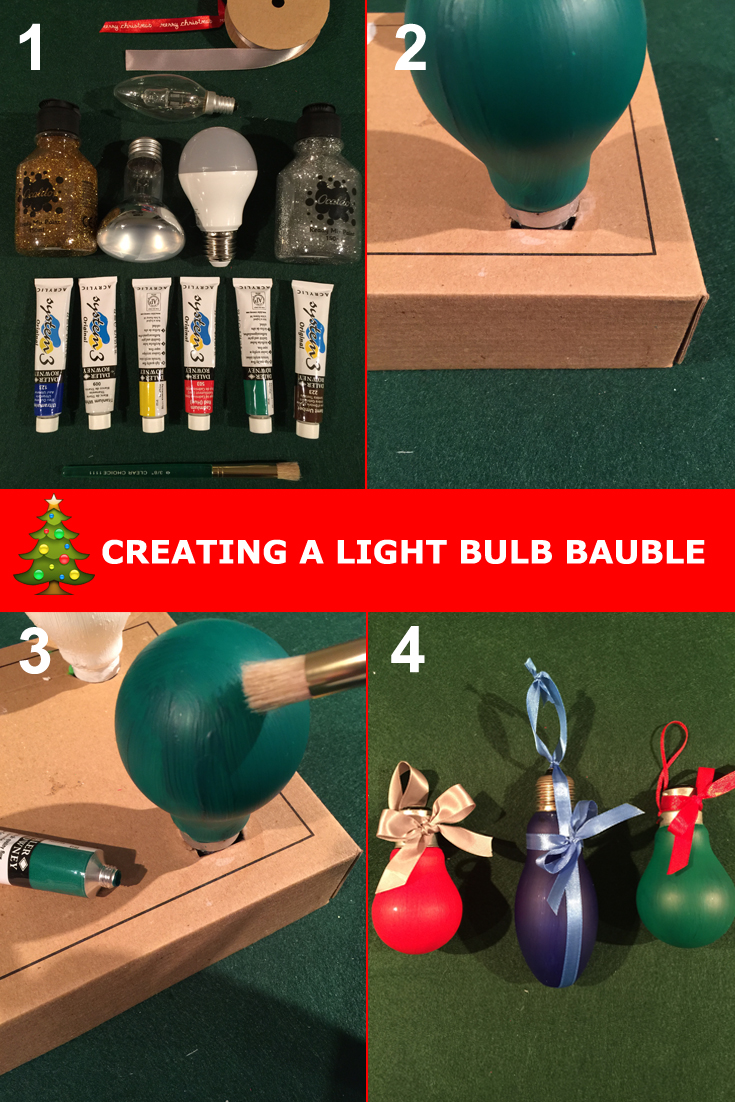
When your light bulb blows, what do you do with the light bulb you replace? We hope by now you know to recycle the bulb correctly, but have you considered upcycling this? They make simple, yet effective baubles to decorate the Christmas tree with.
Stage 2 : Painting the light bulb can be a messy task. We came up with the idea to push the base of the bulb into a shoe box lid, allowing you to keep your hands free to paint and paint the whole surface in one go without mess. This is an optional stage, you can simply paint the bulbs one side at a time and allow it to dry if you do not have a box or something similar.
Stage 3 : Begin painting the light bulb with a light coat of paint in your colour of choice. The paints used on the first coat must be oil paints otherwise the paint will easily rub off the glass. Once the first coat has been applied you can use water based paints if you wish to paint a design or pattern. We kept ours simple with a classic bauble look.
Stage 4 : Take your ribbon and begin tying around the stem of the bulb, add a bow if you wish or just loop the ribbon to hang on the tree. Cut the excess ribbon from the spool and tie the ends. Your bulb is now ready to hang amongst your other tree decorations.
CD Star
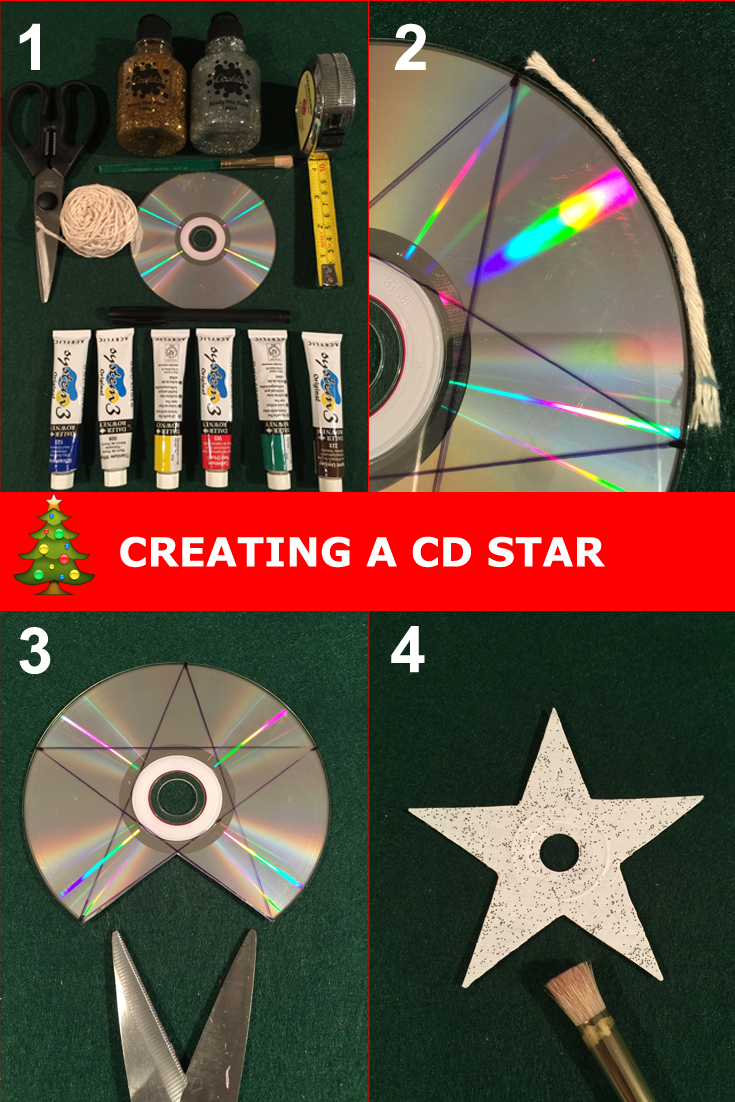
Before the digital age we used to get our music on CDs, you know, the round, reflective cassette replacements. Ok, so we still use them but i’m sure you have waste CDs littering the draws of your home. We took a load of old discs that contained printer drivers and wanted to upcycle them into star decorations.
Stage 2 : To create a five point star, measure out 7.7cm in string and cut this length. Using the marker pen, put a mark where 12 would be on a clock face. Then using the cut length of string, stretch the string round the cd then mark the end of the string and repeat this process round the CD. This will give 5 points around the CD, roughly at equal distances. Then using the pen and a ruler join up the points to create the star shape.
Stage 3 : Taking a strong pair of scissors, gently cut the star shape out. Take care with the CD edges as they maybe slightly sharp.
Stage 4 : Decorate the star using the brush and oil paints to suit. We simply put a base layer of white oil paints then added silver glitter paint to reflect light on the decoration.
Christmas Painted CDs
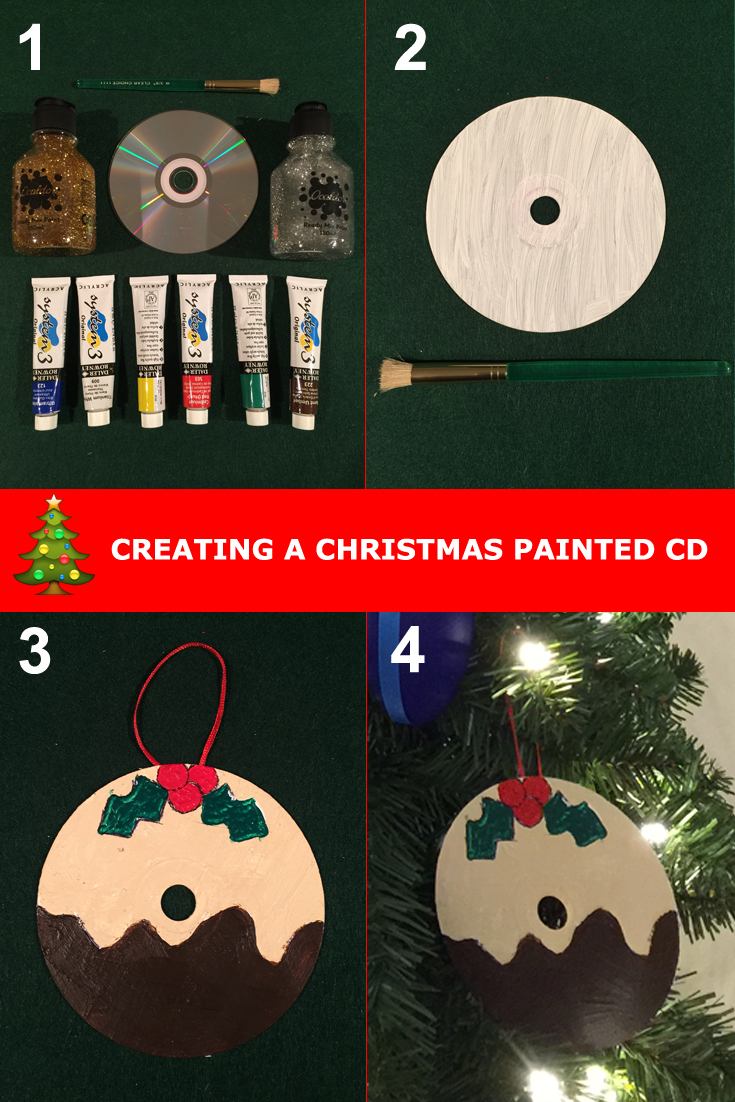
Another use for your redundant CDs is to use them as a canvas for your Christmas art. This is a great activity for children to get involved in, they can create their own Christmas design on the CD..
Stage 2 : If you wish to use non oil based paints you will firstly need to put a base layer of oil paints on the CD face, here we used a white base layer.
Stage 3 : Once the base layer you are then able to apply your chosen design onto the CD. We chose a simple Christmas pudding design in oil paints and once dry we stuck a small loop of ribbon to hang the decoration with.
Stage 4 : Hang your design on your tree amongst all your other decorations. You can put any design onto your CD so get creative with them.
We hope that you found our designs interesting and are inspired to reuse and upcycle waste items from your home. Our Christmas tree is now decorated with upcycled waste and it looks great. Merry Christmas and if you found this interesting please share with others.